A couple of years ago I found the Herald King B-433 decal set for a TP&W 50' modern box car in the bargain bin at my local hobby shop. For $1, I went ahead and bought it even though I had no plans at the time to build one of these cars.
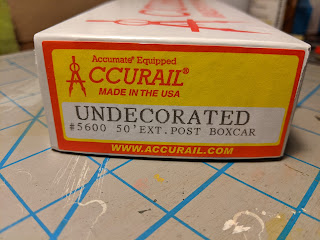
I later acquired an undecorated Accurail 50' exterior-post boxcar to use with these decals.
The First Attempt
I actually started this project a year ago thinking it would be a good practice airbrushing project. My original plan was to use Badger's MODELflex paints. Prior to getting an airbrush I had never considered using MODELflex because I remembered the Model Railroader product review from years ago that said it was a poor brush paint. I confirmed this when I tried to compare different options for TP&W red-orange on a piece of white styrene. I brushed small areas of the different MODELflex colors onto the styrene and was very disappointed in how the paint beaded up and wouldn't spread out to cover the surface or stay where I brushed it.
I tried airbrushing the boxcar with 16-02 Reefer White and it didn't go well. The paint didn't atomize well and I ended up putting it on pretty thick to get an opaque coat. I didn't thin the paint (hey, it's advertised as airbrush-ready straight from the bottle!) and sprayed at 25 psi. If I were trying this today I would at least increase the pressure to get a finer spray and maybe thin the paint as well. While my issues spraying MODELflex were probably the result of my inexperience at airbrushing and not the paint itself, I gave up on MODELflex after this experiment because the poor brushing performance was a deal-breaker for me. It's pretty important to me to be able to do touch-up with a brush.
I tried removing the white MODELflex from the boxcar with 91% isopropyl alcohol and, even after a week of soaking in the alcohol, the paint wouldn't come off. This was surprising to me because up to this point I had always had very good luck with 91% alcohol. I also tried Windex, thinking that the ammonia in the Windex would attack the acrylic resin, but this was only slightly more effective than the alcohol. Ultimately I was successful in removing the MODELflex with Super Clean Tough Task Cleaner-Degreaser. This stuff contains sodium hydroxide, so I wore the thick, reusable rubber gloves when using it. After this experience, I have to say I was impressed with MODELflex's durability.
The Second Attempt
I came back to this project right after New Year's. I primed the car body and doors with Vallejo 70.601 Grey Surface Primer, and then sprayed the roof with Model Air 71.062 Aluminum.
One goal of this project was to see how well I like Model Air 71.086 Light Red as TP&W red-orange. I'm aware that the real TP&W paint was officially orange (Sherwin-Williams "International Distress Orange" according to a former TP&W dispatcher), but to my eye it looks red in most all of the pictures I've seen. I really liked the Scalecoat II CN Orange-Red color that I used a couple of years ago on a 40' boxcar and caboose 529, and the Model Air Light Red appears to be the closest Vallejo match straight from the bottle to the Scalecoat color. It would certainly be easier for me to use a stock color rather than have to custom-mix one.
The Vallejo Light Red went on VERY light in the first coat, even to the point of looking yellow. It took several coats, even over the grey primer, to get the expected color. I mixed the paint 2:1 with gloss medium to get a decal-ready finish without a separate overcoat. The paint dries a little darker than it looks when wet, but the painted car looked quite orange to me. On the redder end of orange, but still definitely orange.
The Herald King decals, despite their age, went on nicely. Applying the "TP&W" speed lettering over the ribs went better than I feared it would, but I still had to come back at the end and do some touch-up with white paint where the decals cracked. I mostly used Microscale Micro-Sol to set the decals, but on one side of the car I had to use the stronger Walthers Solvaset to get the "TP&W" lettering to settle down over the ribs.
 |
| Before touch-up |
 |
| After touch-up and clear coat |
After wiping off excess decal solvent and lint from the car sides, I gave the entire car a couple coats of 26.518 Matte Acrylic Varnish, thinned 3:1 with Vallejo airbrush thinner. Here's the completed car:
I was a little surprised at how the doors ended up a lighter shade of orange than the rest of the car. The doors are cast in white plastic and the body was cast in dark red, but I primed all parts with the same grey primer.
For comparison, I coupled this car between my factory-painted Atlas C424 and the 40' boxcar I painted a few years ago with the Scalecoat II CN Orange-Red.
The freshly-painted Accurail car looks redder in the pictures than it does in person but, except for those doors, compares favorably with my other red-orange TP&W equipment. The Atlas C424 is more orange and the custom 40' boxcar is more red. I think the Vallejo Light Red on the Accurail car looks better with the lettering in place than it did right after I painted it, but I haven't come to a final decision on whether I will paint future cars and locomotives with stock Light Red or if I'll make a redder custom mix.
Now that this boxcar is out of the queue, I'll probably take a break from car and locomotive projects and focus on making some progress on the layout.


No comments:
Post a Comment